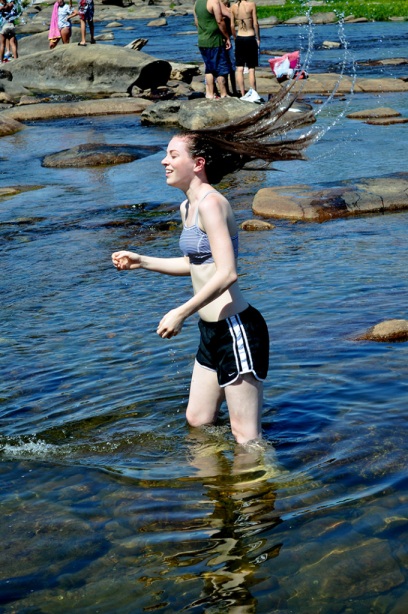
Shutter speed is the length of time a camera’s shutter is open–essentially, how fast it goes “click” when you press the button to take the picture. Shutter speed is measured in fractions of a second, so 1/10 is actually a pretty long and slow shutter speed, whereas 1/400 is very short and quick. On a practical level, the faster the shutter speed, the more “frozen” the action you capture–in the picture above, the droplets of water and the shadows they cast on my arm and face are frozen in place. Slowing down the shutter speed will mean motion in your pictures has a “blur” to it, which can be frustrating when you want a crisp image, but great when you play with it in the right way and are able to capture a sense of movement.
If you have a camera that allows you to manually set your shutter speed, I’d like to encourage you to play with it. My camera (Nikon D5000) has a setting called “S”, which stands for “Shutter priority.” I can dial the shutter speed up, or dial it down with the little rotator thingy. By using this setting, the camera will automatically adjust the aperture for you so that you don’t have to worry about any other settings and can simply focus on setting your desired shutter speed.
“Rotator thingy.” Don’t you love how precise I am?
Here are some fun examples of what can happen with different shutter speeds.
FAST SHUTTER SPEED (1/250 or faster)
A fast shutter speed will freeze your subject, like this picture of my friend Vessie I posted a couple weeks ago.
My friend Vessie took these shots of me when we were swimming/sunbathing at Pony Pasture in Richmond.
Please ignore the dorky expression on my face in the picture above–the point is the frozen arc of water.
And no, in case you’re wondering, the sunbathing didn’t do any good. I am still as white as bleached flour, though I may have gained an extra freckle or two. And a couple pounds from all the snacks we brought–yeah, that too.
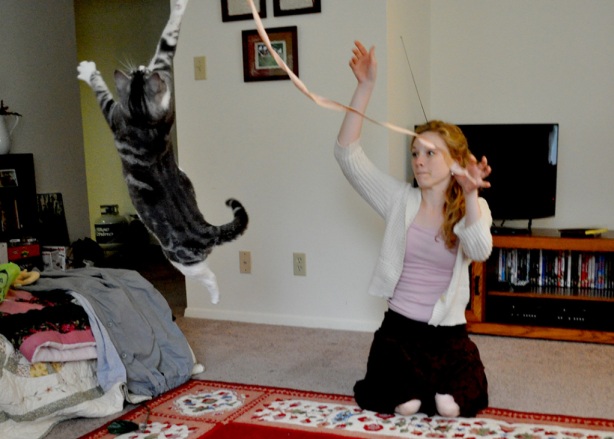
It’s also fun to use a fast shutter speed to freeze pets in motion, like my sister Erica’s cat Teds. The shutter speed wasn’t quite fast enough, so it’s not as crisp as I would want it, but you get the point.
Children in motion are always a favorite–you can capture the most bizarre, hilarious expressions. This is my friend Eve’s son. This picture just makes me laugh.
SLOW SHUTTER SPEED (1/30 or slower)
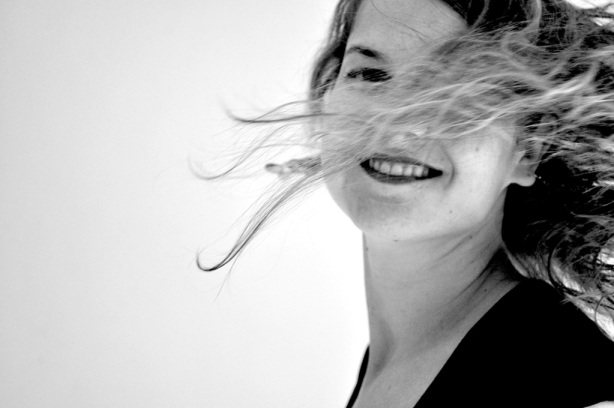
Here is another Vessie-flipping-her-hair picture, but with a slower shutter speed. Unlike the one I posted above, this one captures the motion of her head.
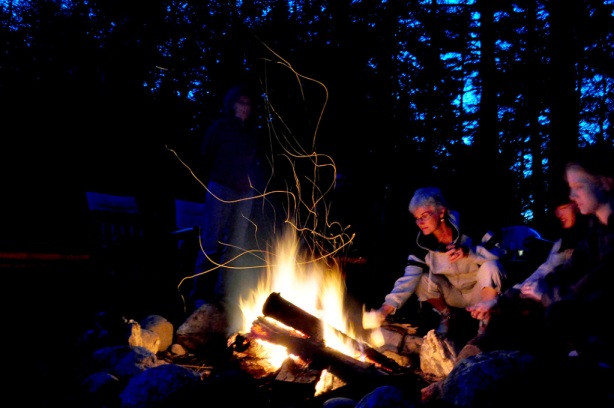
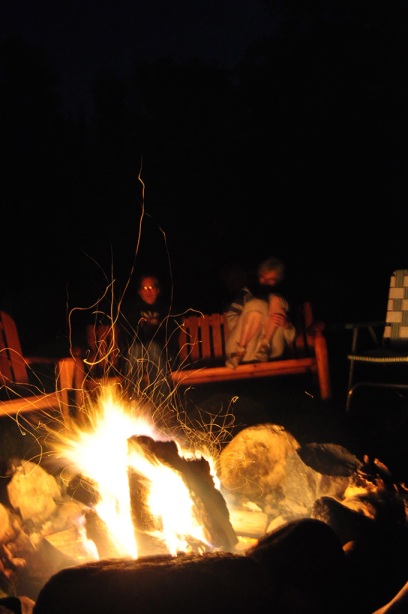
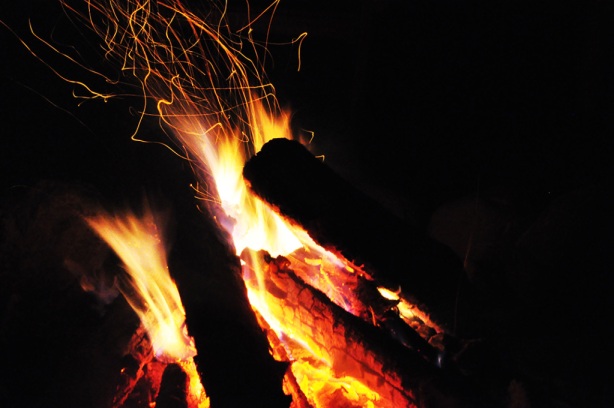
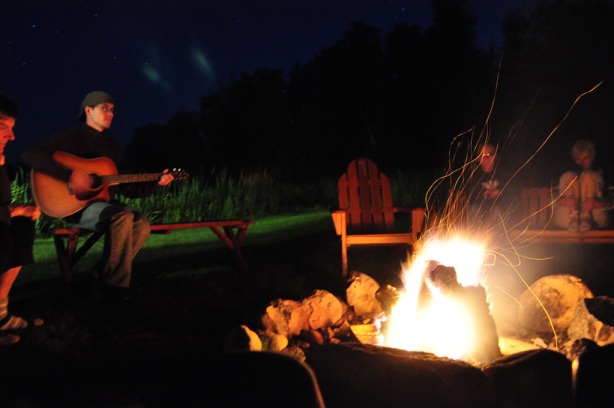
I also used a very slow shutter speed (1/2 second up to 5 or 6 seconds long) for some camp fire pictures at Family Vacay 2010, up in the North woods of Wisconsin.
As you can see, the camera has captured the motion of the people, but also the motion of the embers floating upwards–we can see the whole trail they follow.
Don’t the trails of light kind of look like party streamers?
You can use this same technique to capture moving traffic at night so that your final picture shows trails of light instead of individual vehicles.
I should note at this point that when your shutter speed is very slow (especially 1/30 or longer), any movement of the camera will result in a blurry picture, so make sure you have a tripod or tripod substitue. I have a tiny tabletop tripod that’s about the height of my hand. I love that thing, mainly because it’s so small and folds up so nicely that I can slip it into my purse. In fact, I always carry it with me. You never know when you’ll be going about your regular business and suddenly need to capture an image with a slow shutter speed–you gotta be ready in this crazy world, I’m telling you. But no need to dash out and purchase a tripod–you can also simply set your camera on a chair or table, and use books or magazines to prop it up at the right angle so that it can capture the frame you want.
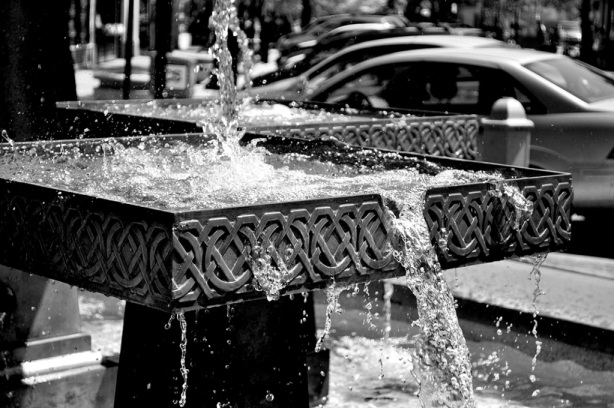
You can also use changes in shutter speed to portray water differently. Here is a picture with fast shutter speed (1/400).
See how the water is “frozen” in action?
However, by slowing down the shutter speed to 1/2 second or even multiple seconds, you can achieve that ethereal, smooth water effect that many photographers like to play with (click here for an example). I had full intentions of giving you an example from my own camera . . . but there’s a piece to this that I couldn’t figure out. With my shutter speed set so slow and in the bright daytime sun, my camera was “absorbing” too much light. I set my ISO (essentially, the sensitivity of the camera to light) as low as possible. I made sure my aperture was as small as possible (f22)–but with a shutter speed of even 1/5 of a second, there was still so much dang light that every picture I took was simply bright white. Any more experienced photographers know how to fix that problem?
Anyway, go forth into the world and play with your camera settings! I am by no means an expert, but if I can encourage any one person to switch out of “automatic” and start using their camera to a fuller potential, I will have achieved my mission here.
For tomorrow, the roast recipe I promised you last week. In the meantime, cheerio!




Pingback: The Great Outdoors – Part 2 | Photo By Holly
Great tutorial, Jenna! Easy to understand (Which is good for me), and I love your examples. The fire photos are great, I love the streaks from the sparks! I added a link to your blog in my post today (hope that’s OK). 🙂
Of course I don’t mind that you linked to me–thanks so much! Photography is such an exciting new world for me, and I’m loving the whole experimentation process. =)
Great! I feel the same way about photography – and it’s so nice that there are so many great people here on WP who are willing to help and share their experiences!! 🙂
Sounds like your shutter was too low. try again another time and play around with the shutter speed – go higher. Water flows so quickly, it doesn’t take a super low shutter to capture that ethereal look. Also, try the shutter priority mode on your camera – let the camera make the decision about aperture and ISO and see if you get better results. 🙂
Thank you Jenny! I will try again next time I encounter some water. =)
I love playing with the different shutter speeds, it makes some very cool effects! Love the water arc photo!
Awesome shutter speed photos! 🙂 The water photos are great! Thanks SO much for commenting and for being a “good girl” and following the link 🙂 I KNOW that your comment means a ton to Pam!
xo-Kim
What Korean women will pay to have skin like yours, whiter the better! 🙂 Great tutorial, Jenna!
What awesome pics!!
Love the black and white water arc photo with you hair forward. It’s a really cool effect and you don’t have a dorky look on your face, but even if you did, those make the best pictures anyway, like the one of “Thing 2.” hehe
The best time to use slow shutter speed is at night. Andrew has taken pictures with 15 seconds (the slowest our camera goes) when it’s really dark with just a few light sources and the pictures come out with an early sunrise sort of look. Lights reflected on water at night, street lights, lightning, star trails or fireworks make good slow shutter subjects. But a tripod (or substitute) is always necessary and even more importantly, using the timer. The act of pressing the button will blur your picture too much if you have a slow shutter speed.
Great advice. I’ll definitely use the timed shutter release for these kind of shots moving forward. I can’t wait to experiment some more with some of the examples you give–if I could capture lighting, that would be AMAZING.
Excellent article/tutorial. Can’t wait to experiment. I did some “smoke” shots where you black out the room and leave the shutter open. I love the floating embers.
Citymom
Ooooh! Do you have a link to those smoke shots? I’d love to take a look.
To fix the problem you may have to use a neutral density filter (ND filter) to reduce the amount of light passing through the lens. This link would give you the details: http://en.wikipedia.org/wiki/Neutral_density_filter
Hope it’s helpful to you. By the way, I support your mission to encourage people to switch out of “automatic” =)
Hooray! Thank you Gloria–this was very helpful. =)
Super-Duper site! I am loving it!! Will come back again – taking you feeds also, Thanks.
like others have said, a neutral density filter will help a lot as will taking shots later in the day. Ill have some shots up on my blog tomorrow of long exposures with waterfalls. I took them just as the sun had completely set and they were 25-30 sec exposures with 100 iso and an aperture of f9-16 i think.
-nick
Thank you Nick! I look forward to checking out the shots on your blog tomorrow, and I appreciate the detailed camera setting info.